
Reviewed · SAVANNAH SQUARES & HISTORIC WALKING TOURS
Civil War Savannah!! Guided Walking Tour
Savannah’s war story hits different in daylight. This guided Civil War walk threads through the Savannah Historic District, starting at Warren Square and ending at the Green-Meldrim house—where Sherman stayed and sent his famous message. I love how the guide ties big-picture Civil War events to the actual streets, buildings, and squares you can still see today. I also like the way you pass homes linked to prominent Confederate generals, then circle back to what everyday people had to deal with.
One thing to consider: this is not a nonstop battle-sites tour. Some of what you cover is Savannah’s wider history and the lead-up to the war, so if you expect constant action and major combat scenes, you may want to set your expectations before you go.
In This Review
- Key highlights worth your attention
- Entering The Story at Warren Square
- Savannah Historic District: colonial roots and the war’s messy timing
- Passing Homes Linked to Confederate Leadership
- How the guide frames Union vs. Confederate strategy
- A closer look at the tour’s Civil War vs. Savannah balance
- Sherman’s headquarters: ending at the Green-Meldrim house
- Group size, pacing, and how long it really takes
- Practical tips before you go (save yourself the hassle)
- Who should book this Civil War Savannah walking tour?
- Should you book this tour?
- FAQ
- How long is the Civil War Savannah guided walking tour?
- Where does the tour start and end?
- What is the main meeting point?
- What does the tour include?
- Is there an admission ticket fee?
- Do I need hotel pickup?
- What language is the tour offered in?
- Is it wheelchair-friendly or accessible for everyone?
- Can I bring pets?
- What happens if the minimum number of travelers is not met?
- What if weather cancels or changes?
Key highlights worth your attention
- Warren Square as the launchpad, with Sherman’s occupation story and the telegram context
- Savannah Historic District scale, one of the largest National Historic Landmark Districts in the U.S.
- Homes tied to prominent Confederate generals, seen as you walk the neighborhood
- Union vs. Confederate strategy, explained with what the city’s layout allowed
- Civilian hardship focus, not just military history
- A guided experience built for people who like details, with memorable humor from guides like Will, Brad, and Zach
Entering The Story at Warren Square
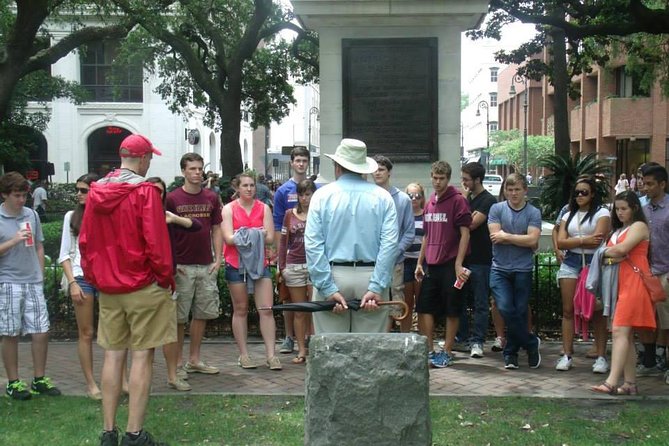
The tour opens in Warren Square, a real civic room in the middle of Savannah’s Historic District. This is a smart start because the Civil War didn’t begin in a vacuum—it built on years of government, trade, and power. From here, you’re pointed toward the kind of thinking both sides used: control key locations, disrupt logistics, and pressure morale.
One of the most memorable moments is how the guide frames Sherman’s occupation and his message to President Lincoln. The tour doesn’t just drop a date and move on. You get the sense of why Savannah mattered when Union forces took hold—how the city’s position made it strategically useful, and why the symbolic weight of a major port city carried so much.
You’ll also get the wider Savannah angle early: the Historic District was the center of colonial government in the 1700s, and it’s tied to Georgia’s early Revolutionary-era story (including the first reading of the Declaration of Independence in the state). That matters, because the Civil War is partly about politics hardening into armed conflict. Walking through the same spaces that once handled governance helps the conflict feel less abstract.
We have more walks through Savannah's historic squares and old district to wander



Savannah Historic District: colonial roots and the war’s messy timing
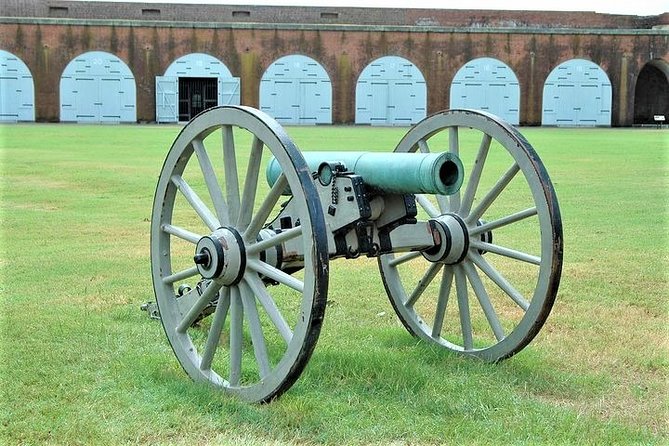
Savannah’s Civil War timeline is the kind of detail that makes the whole tour click. You learn that the war’s effective start for this region comes earlier than the headline event most people memorize. In January 1860, Georgian troops seized Fort Pulaski—three months before the attack on Fort Sumter in Charleston, often treated as the official start.
I like that the guide keeps making these connections. It helps you understand that the Civil War didn’t simply “switch on” one day. Pressure was building through 1860, and places like Savannah were already pulled into the conflict’s orbit.
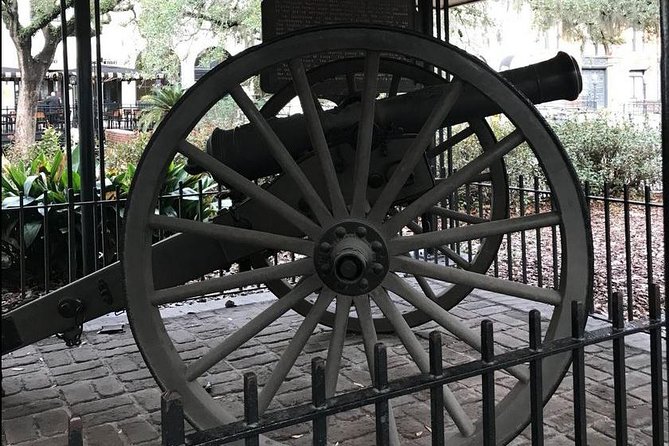
As you walk, the architecture becomes part of the lesson. You’re not just admiring old buildings for looks. The guide points out how the built environment shaped what could happen—where troops and supplies could move, where authority sat, and where civilians had to live with the consequences. Savannah is full of history in stone and brick, but the tour pushes you to notice how those features map onto strategy and hardship.
And yes, you get the “how did people survive this” angle. The Civil War meant scarcity, fear, disrupted routines, and constant uncertainty for civilians. The tour doesn’t treat locals like background noise. It treats their hardships as part of the war’s real story.
Passing Homes Linked to Confederate Leadership
A standout part of the walk is seeing residential sites tied to prominent Confederate generals. You’re not touring a museum with placards only. You’re walking past the kinds of buildings that once carried influence and decision-making power, and the guide connects those homes to the people and priorities behind the scenes.
This is valuable because it grounds leadership in place. When you hear about military planning or strategic choices, it’s easy to picture generals as figures on a map. Seeing the real neighborhood makes the history feel more human. It also reminds you that many big wartime decisions were made by people embedded in the same cities that suffered their outcomes.
The tour also tends to keep the storytelling balanced. It’s not only Confederate-focused, and it’s not only Union-focused. Instead, it asks you to compare the logic behind each side’s approach and to understand why Savannah became such a prized target.
How the guide frames Union vs. Confederate strategy
The guide spends time on strategy—North and South—without turning it into a dry lecture. You’ll hear about what each side wanted from Savannah and what they needed to accomplish to get there.
The context is built around practical military realities:
- Control the approaches and key points that affect supply
- Limit the opponent’s options
- Use timing and pressure to change behavior
Savannah’s fort connections also come into play. The city’s relationship to coastal defense and the Fort Pulaski story is part of why this area mattered so much early on. Then the tour carries you forward to the occupation story tied to Sherman.
One detail I appreciated is that the guide explains conflict in terms you can picture while walking. You don’t just get a timeline—you get a sense of how decisions shaped movement through streets and districts, and why the city’s civilian population faced so much strain.
A closer look at the tour’s Civil War vs. Savannah balance
Let me flag this clearly: the walk is as much about Savannah as it is about the Civil War. The Historic District story is used to help you interpret the war period, and that can be perfect for some people. If you’re the type who wants the “why Savannah, why here, why now” story, this format will land well.
On the other hand, if you’re expecting constant combat details and a heavy dose of battlefield action, set expectations early. Savannah in this era is often described through occupation, planning, and political pressure more than through dramatic street fighting. The tour still includes Civil War specifics, but it uses Savannah’s older history to explain them rather than treating war as a separate chapter.
So here’s my advice: think of it as a Civil War context walk through the city’s power center. You’ll come away understanding how Savannah fit into the conflict and what that meant for both soldiers and civilians.
We have more Civil War and Southern-history tours across Savannah to follow




Sherman’s headquarters: ending at the Green-Meldrim house
The tour finishes at the Green-Meldrim house, also known as Sherman’s headquarters. It’s on the west side of Madison Square, at the intersection of Bull and Harris St. Ending here works because it ties together the occupation story and the telegram moment you hear near the start.
This finish point gives the walk a clear payoff. You started with the lead-up and the civic significance of Savannah. You ended at the place linked to the Union command presence that followed. It’s a tidy arc: from Savannah’s early political importance and early-war signals, toward Union occupation and messaging.
If you’re the kind of traveler who likes a strong “bookend” to a walking tour, you’ll appreciate that the end location isn’t vague. It’s a named, specific stop with a direct historical connection that your guide has already been steering you toward.
Group size, pacing, and how long it really takes

The tour runs about 1 hour 45 minutes and caps at 30 travelers. That matters because smaller groups usually mean you’re not spending the whole time waiting for people at each corner. In practice, you should expect a steady walking rhythm with time to pause and listen at key spots.
Most travelers can participate, and the main requirement is practical: comfortable shoes. You’re walking through Savannah’s Historic District, and that means more time on foot than you might expect from a tour that sounds compact on paper.
Pets are welcome, and the meeting area is near public transportation. If you’re hopping around Savannah without a car, this tour fits that style well.
Practical tips before you go (save yourself the hassle)
Here are the real-world things that will make your walk smoother:
- Wear shoes you trust. Uneven sidewalks and long pauses add up, even on a short tour.
- Check weather before you leave. Savannah can be hot and muggy, and the walk is outdoors the whole way.
- Bring a light layer if you’re sensitive to air conditioning later in the day, especially if you’re pairing this with indoor stops.
- Arrive a few minutes early at 22 Habersham St. The tour starts there, and you’ll want a calm start to match the guide’s pacing.
- Use the mobile ticket. The tour uses a mobile ticket format, so make sure your phone has battery.
If rain pops up, don’t panic. You’re outdoors, and Savannah weather is unpredictable. Just be ready with the basics.
Who should book this Civil War Savannah walking tour?
This is a great match if you:
- Like history that connects to streets, squares, and buildings you can see
- Want a guided “Civil War in Savannah” overview that stays understandable
- Prefer storytelling with humor and human detail, not dry facts only
- Enjoy comparing North vs. South strategy and thinking about civilian hardship
It’s also a good pick for families and for older kids who like American history and want context. The route doesn’t require specialized skills—just energy and good walking shoes.
If you’re only interested in major battles and siege-like action, you might find the Civil War content more interpretive than you expected. In that case, it may still be worth it, but pair it with another Savannah Civil War-related visit so you get both context and conflict.
Should you book this tour?
I’d book it if you want a guided, efficient way to understand why Savannah mattered in the Civil War—and how the city’s civic history, architecture, and leadership homes shaped what happened. The ending at Sherman’s headquarters is a strong finish, and the starting point at Warren Square sets up the story in a way that makes later stops make sense.
Skip or adjust expectations only if you’re chasing nonstop battle footage. This tour is more about strategy, politics, and civilian experience than constant fighting scenes. If that’s your kind of history, you’ll likely feel like you squeezed a lot of meaning out of a short walk.
FAQ
How long is the Civil War Savannah guided walking tour?
It lasts about 1 hour 45 minutes.
Where does the tour start and end?
It starts at 22 Habersham St, Savannah, GA 31401, USA. It ends at 14 W Macon St, Savannah, GA 31401, USA, at the Green-Meldrim house (Sherman’s headquarters area) on the west side of Madison Square.
What is the main meeting point?
Meet at 22 Habersham St in Savannah.
What does the tour include?
You’ll get a professional guide and history of Savannah’s role in the Civil War.
Is there an admission ticket fee?
The ticket is listed as mobile and admission is free for the tour’s included access point noted for the start area.
Do I need hotel pickup?
No, hotel pickup and drop-off are not included.
What language is the tour offered in?
The tour is offered in English.
Is it wheelchair-friendly or accessible for everyone?
Most travelers can participate, and comfortable shoes are recommended, but no specific accessibility details are provided.
Can I bring pets?
Yes, pets are welcome.
What happens if the minimum number of travelers is not met?
There is a possibility of cancellation after confirmation if minimum numbers aren’t met. If that happens, you’ll be offered an alternative or a full refund.
What if weather cancels or changes?
The provided information includes free cancellation up to 24 hours in advance for a full refund, but it does not specify weather-based rescheduling rules.
More Tour Reviews in Savannah



More Savannah Civil War and Southern History Tours

More Savannah Squares and Historic Walking Tours



Not quite your thing? Here is more to see and do around Savannah












Savannah Squares & Historic Walking Tours, compared.
 ★ 5.0Savannah History and Haunts Candlelit Ghost Walking TourFrom $393,235 reviews
 ★ 5.0Savannah First Squares Culinary & Cultural Walking Food TourFrom $963,229 reviews
 ★ 5.0Historic Savannah Guided Walking TourFrom $302,918 reviews
 ★ 4.5Savannah’s Ghost City “Dead of Night” Walking Night TourFrom $342,482 reviews
 ★ 4.5Narrated Historic Savannah Sightseeing Trolley TourFrom $352,375 reviews
 ★ 4.5Southern Flavors Food, Pub Crawl, and History Walking TourFrom $601,623 reviews
 ★ 5.0Genteel and Bard’s Savannah Dark History and Ghost Encounter Walking TourFrom $391,546 reviews
 ★ 5.0Bonaventure Cemetery Walking Tour with TransportationFrom $481,467 reviews
Browse the lists this tour appears in